
What a Medical Assistant May Give an Injection
Contents
- Types of injections Medical assistants may give
- The process of giving an injection
- The importance of sterile technique
- The different types of needles used for injections
- How to choose the right needle for an injection
- How to prepare the syringe for an injection
- How to administer an injection
- The different types of injection sites
- How to dispose of needles and syringes
- The importance of proper injection technique
As a medical assistant you may be responsible for giving injections. Here’s what you need to know about the process.
Checkout this video:
Types of injections Medical assistants may give
There are three types of injections that Medical Assistants may give: intramuscular (IM), subcutaneous (SC), and intradermal (ID). Each type of injection is given at a different depth below the skin.
IM injections are given into the muscle. SC injections are given into the fatty layer below the skin. ID injections are given into the dermis, the layer of skin between the epidermis and subcutaneous layer.
The type of injection will be determined by the medication being injected, as well as the patient’s age, health, and specific condition being treated.
The process of giving an injection
A medical assistant may be asked to give an injection to a patient as part of their duties. This is a relatively simple process, but there are a few things to keep in mind to ensure it is done correctly.
The first step is to gather the necessary supplies. This includes the syringe, needle, and medication. The syringe should be of the correct size for the medication being used. The needle should be of the correct size for the syringe and also long enough to reach the desired injection site.
The next step is to prepare the medication. This involves mixing the medication with any diluent that may be required. Once the medication is mixed, it should be drawn into the syringe. The plunger should then be lightly depressed to remove any air bubbles that may be present.
The third step is to find the injection site. The most common injection sites are in the upper arm or thigh. The area should be clean and free of any jewelry or clothing that could impede needle insertion. Once the site is chosen, the skin should be disinfected with an alcohol swab.
The fourth step is to insert the needle into the skin at a 90 degree angle. The needle should then be slowly inserted until it reaches its desired depth. If resistance is encountered, do not force the needle through; instead, try another injection site. Once the needle is in place, depress the plunger slowly and evenly until all of the medication has been injected.
The fifth and final step is to remove the needle from the skin and apply pressure to prevent bleeding. A bandage may then be applied if necessary.
The importance of sterile technique
Maintaining sterile technique is vital when giving an injection to avoid introducing bacteria and other organisms into the body. The first step is to wash your hands thoroughly with soap and water. Next, clean the injection site with an alcohol swab. Once the area is clean, take the needle out of its packaging. Be sure to use a new needle for each injection.
Attach the needle to the syringe and draw up the correct amount of medication. Clean the top of the vial with an alcohol swab before inserting the needle into it. Turn the vial upside down and pull back on the plunger to fill the syringe with air. Inject the air into the vial and draw out the desired amount of medication.
Remove the needle from the vial and tap it gently to remove any air bubbles. Insert the needle into the injection site at a 90-degree angle. As you insert the needle, pull back on the plunger slightly to make sure you haven’t hit a blood vessel. If you see blood in the syringe, remove the needle and start over at a different site.
Once you’ve found a good injection site, inject
The different types of needles used for injections
There are 3 types of needles that may be used for an injection:
-A 23-25 gauge needle is considered a “Fine” needle and is used for vaccinations and blood work.
-A 22 gauge needle is considered a “Medium” needle and is used for intramuscular injections.
-A 21 gauge needle is considered a “Coarse” needle and is used for subcutaneous injections.
How to choose the right needle for an injection
When you are giving an injection, it is important to choose the right needle. The wrong needle can cause bruising, pain, or not work at all.
The three main types of needles are:
-Intramuscular (IM) needles: These are used for injecting medication into the muscles. IM needles are thicker and shorter than other types of needles.
-Subcutaneous (SC) needles: These are used for injecting medication just under the skin. SC needles are thinner and longer than IM needles.
-IV (intravenous) needles: These are used for injecting medication directly into the vein. IV needles are the thinnest and longest of all types of needles.
The type of needle you use will depend on the medication you are injecting and the muscle group you are injecting into. For example, if you are giving a shot of insulin, you will need to use an SC needle because insulin is a very thin liquid that needs to be injected slowly. On the other hand, if you are giving a shot of antibiotics, you can use an IM needle because antibiotics are thicker and can be injected more quickly.
It is also important to choose the right size needle for the job. Needles come in different gauges, which is a measure of how thick they are. The higher the gauge number, the thinner the needle. For example, a 23 gauge needle is thinner than a 21 gauge needle. In general, lower gauge numbers (thicker needles) are used for IM injections and higher gauge numbers (thinner needles) are used for SC injections. However, there is no hard and fast rule – ultimately it depends on what your doctor or nurse tells you to use
How to prepare the syringe for an injection
Medical assistants are often called upon to give injections, and it is important that they know how to properly prepare the syringe. First, they should select the correct size syringe for the medication they will be administering. The size will be determined by the amount of medication that needs to be injected. Next, they should attach the needle to the syringe and ensure that it is securely in place. Finally, they should fill the syringe with the appropriate amount of medication.
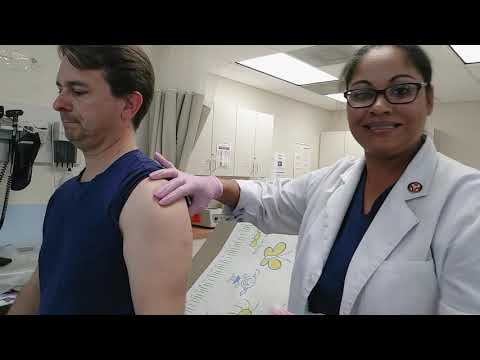
How to administer an injection
There are two types of injections that a medical assistant (MA) may be called upon to administer: intramuscular (IM) and subcutaneous (SubQ). Both types are given at a 90 degree angle. The needle for an IM injection is always inserted into the muscle; the needle for a SubQ injection is always inserted just below the skin surface.
The site for an IM injection on an adult is usually the deltoid muscle of the arm, although the vastus lateralis muscle of the thigh may also be used. For a SubQ injection, sites include the fatty tissue around the triceps, abdomen, or hip. The site for both types of injections on children is usually the vastus lateralis muscle of the thigh.
When giving an IM injection, you will use a longer needle than you would for a SubQ injection because it must penetrate through both skin and muscle tissue. To help ensure that the needle is inserted at the correct angle, use your index finger to palpate (feel) for the bony landmark at the upper outer border of the ilium (the wing-shaped bone at the upper part of your pelvis). This landmark is called the iliac crest and should be perpendicular to your middle finger when your hand is in position on top of
the patient’s clothing at the selected injection site.
The different types of injection sites
There are different types of injection sites, and each has its own set of benefits and drawbacks. The choice of injection site depends on the drug being injected, the patient’s preference, and the clinician’s preference.
Intramuscular (IM) injection: This is the most common type of injection. An IM injection is given into the muscle. The advantage of this type of injection is that it can be given quickly and easily. The disadvantage is that it can be painful, and there is a risk of tissue damage and bruising.
Subcutaneous (SC) injection: This type of injection is given under the skin. The advantage of an SC injection is that it is less painful than an IM injection. The disadvantage is that it takes longer to give the injection, and there is a risk of tissue damage.
Intradermal (ID) injection: This type of injection is given into the dermis, which is the layer of skin between the epidermis and subcutaneous tissue. The advantage of an ID injection is that it provides a way to test for allergies to certain drugs before giving an IM or SC injection. The disadvantage is that it can be painful, and there is a risk of tissue damage and bruising.
How to dispose of needles and syringes
After you have given an injection, there are several things you need to do to ensure that the needle and syringe are disposed of properly. Here are the steps you need to take:
1. Immediately after use, remove the needle from the syringe and discard it in a puncture-resistant container.
2. To remove the plunger from the syringe, hold the syringe barrel with one hand and push down on the plunger with your other hand. This will release the plunger from the syringe barrel. Discard the plunger in a puncture-resistant container.
3. To remove the needle cap, twist it counterclockwise and pull it off of the syringe. Discard the needle cap in a puncture-resistant container.
4. Finally, wash your hands thoroughly with soap and water.
The importance of proper injection technique
medical assistants play an important role in patient care, and a large part of their job is administering injections. It’s essential that medical assistants have a good understanding of the importance of proper injection technique.
Technique is important for several reasons. First, the goal of an injection is to deliver medication to the intended site in the body. If the injection is not properly placed, the medication will not be properly absorbed. Second, improper technique can lead to tissue damage and pain for the patient. Third, poor technique can increase the risk of infection.
Medical assistants must be properly trained in injection technique and must understand both how to prepare the injection site and how to administer the injection itself. The specific steps will vary depending on the type of injection being given, but there are some general principles that apply to all injections.
The first step is to select the appropriate injecting needle and syringe. The size of the needle will depend on the type of medication being injected and the thickness of the patient’s skin. Once the needle and syringe are selected, they should be assembled according to manufacturer’s instructions.
Next, the medical assistant should cleanse the injection site with an alcohol swab or another suitable cleanser. The area should be allowed to dry before proceeding with the injection.
The next step is to insert the needle into the skin at a 45-degree angle. Once the needle is in place, it should be aspirated to ensure that no blood is present in the syringe barrel. If blood is present, this indicates that the needle has entered a blood vessel and must be removed and re-inserted at a different location.
Once aspiration is complete, injected medication can be slowly delivered into tissues by depressing plunger on syringe barrel. After all medication has been injected, needle should be withdrawn from skin superficially at a 90-degree angle followed by applying gentle pressure with gauze pad over injecting site until bleeding has stopped (if necessary).